
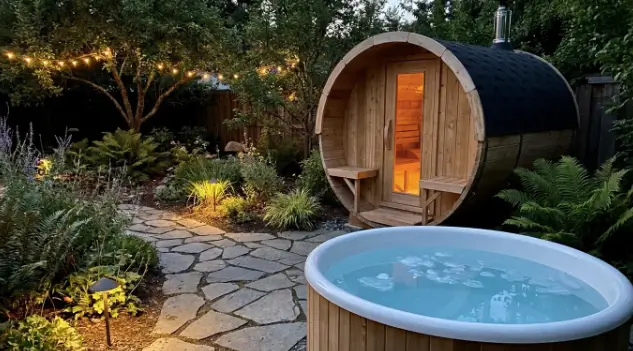
Installing a sauna kit follows a fixed order that saves real time and money: confirm clearances and local code first, prep the pad or foundation second, get the electrical circuit roughed in third, then assemble the panels once the pad has cured. Skipping ahead to assembly before the pad or circuit is ready is the most common reason a finished kit sits unusable for weeks. The steps below cover what actually needs to happen at each stage.
1. Confirm Clearances Before Anything Else
Every kit heater has a minimum clearance distance from combustible walls and ceilings stated in its manual, and this number depends on wattage and guard rail design rather than being a single industry standard. Confirm the clearance figure before finalizing where the kit will sit, since a tight corner that looked fine on paper can fail the heater’s stated clearance once the unit is actually in place. Outdoor kits also need clearance on all sides for maintenance access and for water runoff to drain away from the structure rather than pooling against the base.
2. Check What Permits Are Required
Electrical work for a dedicated circuit needs a permit and inspection in nearly every jurisdiction in the United States, and skipping this step can complicate a home sale or insurance claim later even if the installation itself is done correctly. Some municipalities also require a building permit for an outdoor structure over a certain square footage, so a call to the local building department before the pad is poured is worth the twenty minutes it takes.
3. Prep the Pad or Foundation
Outdoor kits need a level base, commonly a paver bed, a poured concrete slab, or a pressure-treated wood frame set on compacted gravel. The pad needs to be perfectly level in both directions, since even a slight slope shows up as an uneven gap along the bottom panel once the kit is assembled. Concrete needs time to cure before load-bearing weight sits on it, so this step should happen well ahead of the delivery date rather than the week the kit arrives.
4. Schedule the Electrical Circuit
Most kit heaters above 6 kilowatts need a dedicated 240-volt circuit, and a licensed electrician should run this before or during assembly rather than after, since fishing a new circuit through a finished structure is far more work than roughing it in with the panels still open. Confirm the panel has spare capacity for the new circuit before ordering the kit, since a full panel needing a subpanel or service upgrade adds both cost and time to the schedule.
5. Assemble the Panels in Sequence
Panelized kits ship with numbered wall, ceiling, and floor sections and a manual showing assembly order, and following that sequence matters more than it sounds, since panels are often designed to interlock in a specific direction. Two people working a full weekend, roughly 6 to 10 hours, typically finish a small to mid-size kit once the pad and rough electrical are already in place. One person working alone can do it, but panels are heavy enough that the timeline roughly doubles without a second set of hands to hold pieces steady while fasteners go in.
6. Install the Bench Pack, Door, and Heater
Benches go in after the walls are standing, followed by the door, which is usually pre-hinged on a kit-grade frame and just needs to be set and shimmed level. The heater mounts last, wired into the circuit the electrician already ran, with stones loaded according to the manufacturer’s stacking pattern rather than dumped in loosely, since improper stone loading affects both heat distribution and airflow around the heating elements.
7. Test the System Before First Use
Run the heater through a full heat-up cycle with nobody inside, checking that it reaches target temperature within the time the manufacturer states and that the thermometer reading at bench height matches expectations. This is also the point to check door seal, bench stability, and confirm the electrical work passed inspection if one was required. Buyers who want to compare a specific kit’s stated heat-up time and clearance requirements against another model before finalizing their install plan can view current pricing and specification sheets side by side, since clearance and wattage differ meaningfully between kit sizes.
8. Avoid the Mistakes That Delay a Finished Install
The most common delay is ordering the kit before the electrical quote is confirmed, which leaves a fully assembled cabin sitting unusable while a panel upgrade or a scheduling gap with an electrician gets sorted out. A close second is pouring a pad before double-checking the kit’s exact footprint against the manufacturer’s spec sheet, since a pad cut a few inches short forces a rebuild rather than a simple adjustment. A third is skipping the permit step because the work seems small, only to run into problems at resale or during an insurance claim years later when the electrical work cannot be documented as inspected. None of these mistakes are expensive to avoid; they just require doing the paperwork and confirmation steps before the pallet shows up rather than after.
What Does the Research Say About Sauna Use Overall?
None of the installation steps above are health claims, but the reason a correct install matters is that people use a properly built sauna more consistently. A 2018 review in Mayo Clinic Proceedings summarized cardiovascular associations reported among regular sauna users, and a separate review in American Journal of Physiology described physiological changes in circulation tied to sauna heat exposure. A systematic review in Evidence-Based Complementary and Alternative Medicine reported similar associations with regular dry sauna bathing. These remain population-level associations, not proof for any individual household, and they say nothing about installation quality specifically, but a kit installed correctly and used without frustration is the one most likely to be used often enough for any of these associations to be relevant.
Frequently Asked Questions
What is the correct order of steps for installing a sauna kit? Confirm clearances and code first, prep the pad, schedule electrical work, then assemble the panels once the pad has cured and the circuit is roughed in.
How much clearance does a sauna kit need from combustible surfaces? Several inches at minimum, with the exact figure specified by the heater manufacturer since it varies by wattage and guard design.
Does a sauna kit need a permit? Electrical work almost always requires a permit and inspection. Some jurisdictions also require one for an outdoor structure over a certain footprint.
Can one person assemble a sauna kit alone? It is possible but slower, since panels are heavy. Two people finish a small to mid-size kit in a weekend; solo work roughly doubles the timeline.
References
- Cardiovascular and Other Health Benefits of Sauna Bathing: A Review of the Evidence, Mayo Clinic Proceedings, 2018
- Effects of heat and cold on health, with special reference to Finnish sauna bathing, American Journal of Physiology, 2018
- Clinical Effects of Regular Dry Sauna Bathing: A Systematic Review, Evidence-Based Complementary and Alternative Medicine, 2018
By Holly Vance